Tuesday, December 18, 2012

Who's Overwhelmed by the Holidays?

I am I am! Aye dios mio there's so much to do and Christmas is a WEEK AWAY! How did that happen?! I'm breaking out in cold sweats just thinking about it. I hope you are all much more prepared than I! What was I thinking doing baked presents for everyone? In addition to my orders, I'm swamped!

I probably wont be back until after the holidays so I hope that everyone has a great Christmas or anything else you may celebrate and a very very happy New Year!!


Sunday, December 9, 2012

Poached Pears!

A friend of mine introduced me to poached pears a few years ago. I don't know how I had never had them before, but now they are one of my favorite winter treats! Seriously so much goodness from puttin booze in a fruit. Well, you don't have to use alcohol, poaching just means gently cooking in boiling or simmering liquid. But I always have included booze. Because booze.

Here is a great recipe I like for poaching pears in a pomegranate sauce. The cinnamon and clove are perfect flavors for a holiday dessert!

Pomegranate Poached Pears


Ingredients

4 ripe, firm organic Bosc pears
1 & 1/2 cups pomegranate juice
1 cup sweet dessert wine (Muscatel or Riesling). I actually found a pomegranate wine that I use with this recipe and it's baller.
2 cinnamon sticks
1 vanilla bean
1 tablespoon whole cloves
Put everything but the pears in a large pot and get to simmering.

Now you have some options on what you want to do with the pears. Definitely peel them, but after that you can leave them whole, core them, or slice them up. Either way it's going to be yummy, but I like to keep them whole and just core them because presentation-wise it looks real fancy.

Place the pears in the liquid, on their sides, and cover the pot. Cook for about 20 minutes, or until tender. Make sure you turn the pears every little bit, so that the color is consistent all around.

Once the pears are tender, remove them from the liquid. You can then reduce the liquid, if you want to make a syrup to serve with the pears. I like to serve them with a small scoop of mint ice cream. I don't know why the flavors taste so good together to me. But do with them what you will! The pears are delicious and I'm sure you'll dig 'em!


Tuesday, December 4, 2012

Out of the Kitchen Tuesday #4

At home chalkboard menues! Have you seen them? I love them! It's a great way to put some fun and style into meal planning. If you live with someone, it's also a good way to keep track of whose night it is to cook. Both my boyfriend and brother are about to move in, so I think this is going to really help us figure out dinners. (Also, ack I'm about to live with two boys when I've been living alone for about four years! Adjustment time!)

I saw this menu from WhipperBerry on Pinterest and thought it was a great idea!

How adorable is that? I wanted to do something similar, but that matched the style of my home a little more. What I really wanted was a good white frame for my chalkboard. It took me a while to find the right thing, but I finally stumbled across what I had been looking for at Ikea! Huzzah Ikea!
And for only 10 bucks! Whatta deal! So I grabbed the frame, it even had that black backing like it was screaming to be a chalkboard. I already had some chalkboard spray paint that I had picked up at Michael's, so I was all set there. I took the black piece of cardboard out of the frame and spray painted it in my garage. 

Once two coats had dried, I put the whole thing back together with the chalkboard piece facing out. I wrote out my menu for the week then hung it up right outside my kitchen. It's so perfect! It's exactly what I had been picturing and I love it!


Super cheap and easy to make! Now I just have to make sure my boyfriend and brother stick to their meal schedules :P


Sunday, December 2, 2012

Christmas Cookie Roundup!

Heading into the holidays, I have been thinking about traditions. When I was little, my mom and I used to have a yearly tradition of baking several types of Christmas cookies and taking plates of them, wrapped in cellophane, to all of our neighbors.


This was one of my favorite parts of the holiday season because I got to help my mom bake what seemed to be thousands of cookies. My favorite to make were the candy cane butter cookies because I got to help roll out the dough into long snakes of red and white. But my favorite to EAT were the chocolate crinkles. So chewy and fudgy, omg so good. Those are still one of my favorite types of cookie, and I'm really getting in the mood to make some. Although, that's highly dangerous as I'm likely to eat the whole batch.

In my Christmas cookie recipe search, I found this Chocolate Crinkle recipe, and it's really great! I've made a couple of batches, and they're soooo good. Plus I added chocolate chips to make them even chocolatey-er.


I haven't carried out this cookie giving tradition in years, but this year I am inspired! Since moving out of my parents' house years ago, I really never have gotten to know my neighbors at any of the other places I've lived. I think that is kind of sad! After years of renting, last year, I finally bought my own home. I think maybe that means getting to know the people who live around me, yes? Even though I've been here for about a year and a half, I really only know ONE of my neighbors, and just barely. Why is it so hard for us to get to know one another? To remedy this, I'm thinking of putting together Christmas cookie plates for my neighbors this year.

I found this great list of Christmas cookies on Pinterest (my not-so-secret love), and these spiral cookies from Sprinkle Bakes look so good! I'm going to have to include them in the mix!
Photo from Sprinkle Bakes

What are some of your favorite Christmas cookies? Did any of you do the neighbor cookie tradition?

Friday, November 30, 2012

J'adore Friday #2 - Holidays!

J'adore Friday! Holiday edition! BECAUSE DECEMBER STARTS TOMORROW! How in the world did that happen? Quickest year ever. Anyway, this is so my favorite time of year, and here are some cool holiday-ey things that I thought you all might enjoy.

Check out these adorable North Pole cupcakes from Tablespoon!

Image from Table Spoon


Most cutest Christmas cards by Lisa Stubbs on Etsy!

Who doesn't love Christmas sugar cookies, especially with peppermint!
Image from The Recipe Critic
Every year I'm so jealous of the people who wrap their gifts so beautifully. I would love to be able to do something like this from Sparkles and Snowflakes

Happy Friday everybody! I hope you are enjoying the holiday season!!


Wednesday, November 28, 2012

New Items in the Etsy Shop!

I hope you all had a great Thanksgiving!! Mine was full of food, fun, and family, and I loved every bit of it! I ended up making three pies, which turned out so good. I did a deep dish pecan, caramel apple, and pumpkin crumble. They were a hit! And I must admit I ate a bit too much of each.

YUM!

Now that Thanksgiving is over, it's time to start thinking about CHRISTMAS! During my days off last week, I got my behind in gear and started getting some new items in my shop, including a few non-baked gift items. I hope you all consider Etsy while doing your Christmas shopping! 

Here are some of the new things you'll see in my Etsy shop!


Happy Holidays!


Tuesday, November 13, 2012

Thanksgiving = PIE

It's PIE TIME! Hey guys! Hey guys! It's PIE TIME! I mean, I know you can make pie all year long, and I did make a couple of pies this year. And if you ask my friend Haya at The Calculated Kitchen, you should really make a pie every day. However, for me Thanksgiving is at least 75% about the pie. I loooove fall pies, especially the quintessential pumpkin. My boyfriend loves Pecan pie most, so Thanksgiving brings our pie loves together and we rejoice with mouthfuls of holiday goodness.

In past years, I have most often been in charge of the whole Thanksgiving dinner, so I kind of cheap out on the pies, and get store bought. It's a little overwhelming to do the whole dinner AND the pies. And I really just don't have the time or the hands. Last year Kris and I went down to LA to spend the holiday with his sister and brother, so I got out of dinner duty and had the opportunity to JUST do pies!

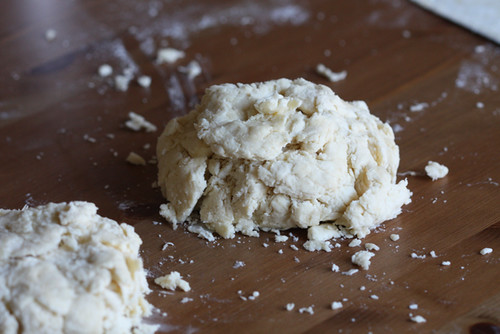
This year I am yet again getting out of cooking the dinner, and only have to provide the pies. Woo! I'm especially excited because this year I have MASTERED pie crust. It's true, people. Pie crust aint no thang for me anymore. I used to be terrified of crust. For some reason it was so intimidating and I always felt like my crusts were lame. But TIS NO MORE! I have made pie crust my bitch, and it's mainly been with the help of Joy the Baker (this chick is awesome and I feel like if we ever met we'd totally be friends. Can we be friends, Joy??). Her method for pie crust is pretty much the bomb. Do people still say the bomb? I'm pulling that out special for this because it really is the bomb. Try it. It will change your life. Never have you had anything as flaky and delicious.

Photo from Joy the Baker

So now that I am a pie crust whiz, I am super pumped about this year's Thanksgiving pies. I'm torn between going extremely classic with just regular ol' pumpkin pie and regular ol' pecan pie, or if I should jazz it up some... There are some pretty great Thanksgiving inspired pie recipes out there and I'm so tempted to get crazy and try something different. Sorry family, you're coming with me on this pie adventure!

These Cream Cheese and Butterscotch Pumpkin Pies by Chef in Training sounds so amazing, but should I go non-pumpkin and try Alton Brown's Sweet Potato Pie?


Photo from Chef in Training

And for the pecan pie, I looooove Trisha Yearwood's classic pecan pie recipe, but I know there are a lot of good pecan pies with CHOCOLATE! How can that be bad? Or this "Mystery" Pecan Pie by Paula Deen has cream cheese as a bottom layer and to me that sounds like something to be thankful for.


 Photo from Foodnetwork.com

What are your favorite holiday pies? Do you change it up every year or stick with tried and true classics?


Friday, November 9, 2012

The holidays are coming... Cider time!

This is absolutely my favorite time of year. Once fall hits, I'm ecstatic. I love the crisp air, I love the change in colors, I love the smell of rain and the quiet blanket of fog in the morning. To me, the season means peace, family, warmth, love, and coziness. One of my favorite things about the season, something that completely represents all of these feelings in one, is warm mulled apple cider.


I love to keep a small pot of cider simmering with mulling spices during the holiday season. It just fills my house with the comforting warm smells of apple, cinnamon and allspice. I usually make up little satchels of cheesecloth filled with my own blend of mulling spices, but this year I found some tea filters at Teavana that I think are awesome for individual cups or full pots of tasty cider.


Using these fill-able teabags, I made some of my mulling spice mix and put together cute individual spice bags! 


They're now available in my Etsy Shop. I hope they make your home smell as delicious and cozy as mine! And I hope your cider tastes extra yummy! 


These sets also make excellent gifts, and I am happy to provide gift wrapping for anything in my Shop :)

Thursday, November 1, 2012

Photo shoot with Danielle Capito and Twigss!

Guys, guys! This is super cool! One of my favorite photographers, Danielle Capito, of Danielle Capito Photography asked if I would like to provide some Tartlet baked goods for a photo shoot with Twigss Floral Studio! HOW RAD IS THAT?!

Of course I jumped at the chance, and worked with Addison at Twigss (she is so super nice) to come up with a menu that fit their theme, haunted library. What an amazing halloween theme! I love it! Twigss put together a beautiful menu chalkboard that listed the items from Tartlet. Their studio is adorable and in the lovely downtown Danville, CA. I highly recommend checking them out for weddings, parties, etc!

I'm so excited to share with you some of the photos from the shoot. Danielle was awesome enough to send some to me. Check out the rest of the shoot at her blog!

Behold, some of the amazing Danielle's photos!

The beautiful menu

Some fig and honey galettes along with plum galettes :)

Plum and blackberry thumbprint cookies with some mini caramel pecan tarts.

German chocolate and salted caramel macarons, with some butterscotch oatmeal crisps.

The lovely models feeding each other Tartlet treats :)

Plum galette!

The full spread.

I'm so super impressed and very grateful to have been involved in this awesome shoot. Addison and Danielle are the nicest ever and very fun to work with. The shoot also got featured on Ruffled!

Thank you ladies for getting Tartlet involved with your photo shoot! 

Tuesday, October 30, 2012

Out of the Kitchen Tuesday #3

Ok, so I'm not good at consistency, and it's been a while since my last Out of the Kitchen post. I have all of these ideas and no time! I finally got to do something crafty over the weekend. On Saturday I spent the day in West Marin with my duder and got to work on a craft project while he did some work for one of his clients. I love spending time in West Marin! Especially getting up for early morning walks in all the natural beauty there.


On my walk this last Saturday, I took Moose to see some sheep. He was both cautious and curious, but the sheep all came out to see him. They came right up to the fence, but Moose kept a pretty safe distance. He's truly a weenie.

After a super tasty breakfast at The Station House, we headed over to Kris's client, me with craft bag in hand. I got to peacefully work on this button headband while Moose slept on the floor next to me. 

I've had this idea in my head for a quite a while, and I've been collecting buttons for it for a couple of months. I was so excited to finally work on it! I love anything with buttons.

I sewed the buttons onto a piece of elastic, after several rearrangements to find the grouping that I liked best. 

Sewing buttons is extremely relaxing, I find. Even though I did break one of my needles in the process and stabbed my thumb pretty good. 

Then I trimmed up the elastic on the back so that there were no bits hanging out behind the buttons. 

The next step was a simple hot gluing to a plain headband! Voila! 

I love it! I can't wait to make more in different colors! If you see any good vintage buttons for sale, I would be stoked if you linked me to them :)

Yay crafts!


Friday, October 26, 2012

No More Mint Brussels :( But WAIT!

So this isn't exactly recent news, but Pepperidge Farm, I have a bone to pick with you. You discontinued my favorite cookie of all time! The classic MINT Brussel! They've been gone for a couple of years now, but I'm still upset about it. The crunchy, crispy, minty, chocolaty goodness will never make my mouth happy again. Or will it??


I've been selling my Butterscotch Oatmeal Crisps on Etsy for a while now, they are crispy and light and awesome. BUT the other day, as I was severely missing Mint Brussels, I thought I just might be able to come close to them using a modified version of my Oatmeal Crisps. I fiddled around in the kitchen for a bit, and came up with this...

The mixture when it's all combined before baking

I used a teaspoon to drop small amounts onto parchment paper

After baking for about 7 minutes


Tartlet Mint Brussels

Cookie:
1/2 cup browned salted butter
1/2 cup light corn syrup
2/3 cup muscovado or dark brown sugar
1 cup old-fashioned oats 
1 1/2 cups all-purpose flour
1/2 Madagascar vanilla bean or 1 tsp vanilla bean paste
1 tsp baking powder

Chocolate filling:
1/4 cup heavy cream
1 cup semi-sweet chocolate chips
mint extract to taste

Cookie Directions:
1. Preheat oven to 375
2. Brown the butter. Because everything is better when the butter is browned. Real talk.
3. Add in honey and sugar and get it all melty-like. You want the sugar to be dissolved.
4. Bring the mixture to a boil, then remove from heat.
5. Mix in oats, flour, baking powder, and vanilla
6. Drop small balls of the mixture onto a cookie sheet, about a teaspoon worth. They will spread so don't put them too close together.
7. Bake for about 6 - 8 minutes or until cookies begin to brown
8. Let cookies cool completely before you add the filling and sandwich them.

Filling Directions:
Heat cream until simmering, then pour over chocolate chips and stir until it all melts together. Add in drops of the extract until it's as minty as you want it to be. It doesn't take much, so be careful! Then put some in the middle of two cookies and you're done! TASTY!

They aren't exactly the same, but they are close enough to make me extremely happy. And I'll probably continue to tinker with the recipe, but I'm on the track. I love you Mint Brussels, welcome back to my life.


Thursday, October 11, 2012

New Things! New Things!

Hello all! I apologize for my posts tapering down again, but there's been lots going on! A) I've had a lot of orders lately, which is AWESOME! Thank you to everyone who has been ordering from my Etsy Shop, and I hope you've enjoyed your treats! B) My day job has been quite overwhelming and frenetic of late. And finally C) I've been working on some NEW things for a very special order, which I will hopefully be writing more about soon. Intrigue!

I just wanted to talk about a couple of the new things that I've made lately, and about some things that will hopefully be available soon in my shop. SO! Obviously the name of the bakery insinuates that there might be some small tarts for sale... I have definitely failed on that front so far. But, do not worry, my little muffin heads! I have been working on some tartlet-ey things lately and have (I feel) perfected a recipe for Turtle Tarts! Behold!

Not only are they SOOOOO GOOOOOD, they are so pretty! I have to say, I am particularly proud of this photo too. I am not the best photographer, as I'm sure you all have noticed, but I think this picture is really pretty and tasty looking. BIG SMILE! Hopefully I will add these, as well as some other tartlet type items to my shop in the near future. Huzzah!

I also have been working with some Autumn produce for this special order, and came up with some really beautiful plum galettes and fig & honey galettes. Check out this picture of the fig & honey!

I would like to put some more galettes up in my Etsy Shop, but I'm having a bit of trouble figuring out appropriate packing/shipping methods for those. So for now, they will only be for local special orders. 

Anyhoo, those are a small tidbit of the things I've been working on in the Tartlet kitchen! I hope to share more with you soon!


Monday, October 1, 2012

Bacon Shortbread!

As you may have seen, I've had Whole Wheat Shortbread up in my Etsy shop for a bit now. It's really good, but I've been trying to think of what I can do to spice it up a little. Give it a little twist. Since everyone is nuts about bacon (including me), I thought I might try adding it to my shortbread! I've always wanted to try incorporating bacon into a baked good. Who doesn't love that salty/sweet combo? I'm a huge sucker for it.


I used my regular recipe for the Whole Wheat Shortbread (using King Arthur White Whole Wheat, it's truly awesome). I then made a good amount of bacon in the oven, to get it nice and crispy. Crumbling bacon is a seriously difficult task. Not because it doesn't crumble easily, but because you want to eat all of the bacon! My kitchen was so full of bacon smell, it took the will power of a thousand will powers, not to gobble it all up (I may have set aside a couple of pieces for eating, shhh...). So after I crumbled it all up, I tossed it with a bit of brown sugar, then sprinkled the mixture over the pan of uncooked shortbread, and baked it like normal.


My house smelled sooooo good! Bacon smell? Plus. Baking shortbread smell? Double plus. Of course shortbread takes forever to bake AND then I had to wait for it to cool before I could try it. But it was worth the wait! Super delicious! Sweet and salty and cookie-ey and bacon-ey! Why did I wait so long to try bakin with bacon?!


Want to try some? Bacon Shortbread is now up for sale on my Etsy Page!

Happy Monday everyone!